In my previous post, I described how I ended up with a Windows tablet that does not have a Windows (or any other OS for that matter) installed. In this one, I’ll write down how I recovered it.
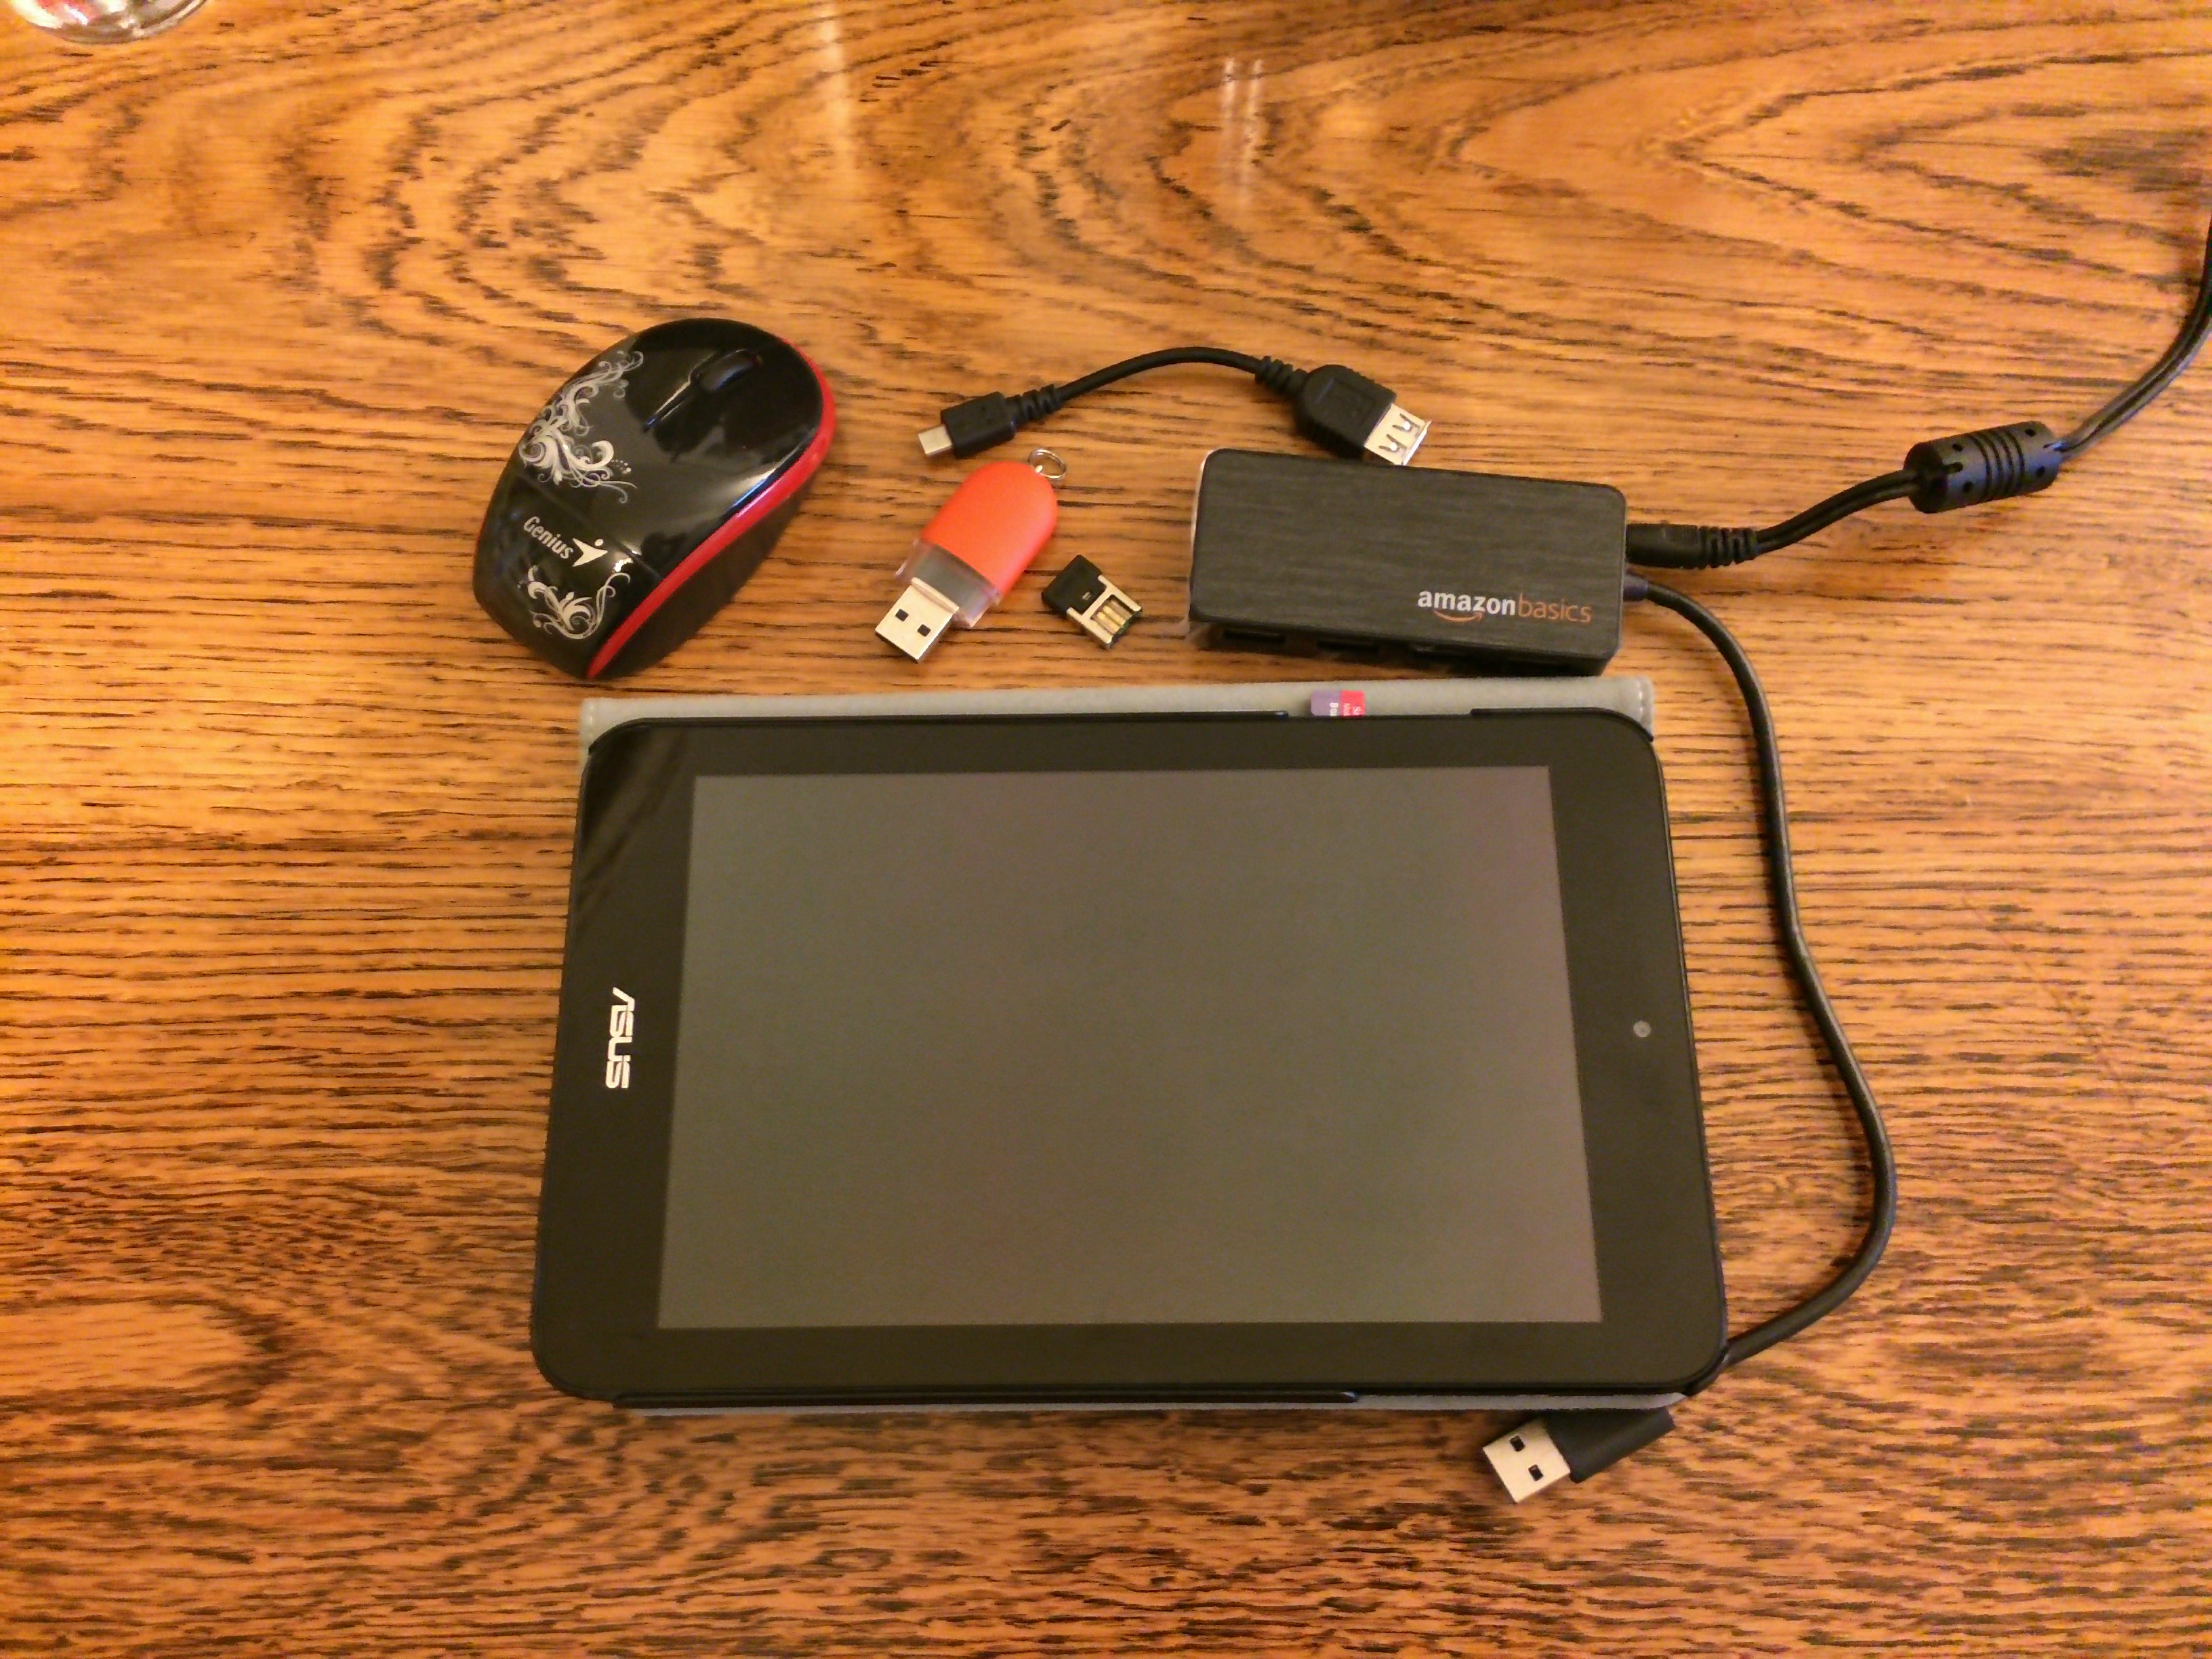
A really good thing about these small tablets is the absence of a discrete USB port. They usually have only one micro USB port – just like phones – which can be used either for charging the device or by plugging in an OTG adapter, as a regular USB port. So one can only hope that the battery won’t run out before the Windows installer finishes copying files from a removable device to the internal flash storage. At first, I thought that this would be my biggest worry.
As soon as I booted into the installer from a USB flash drive, I faced a problem: the touchscreen does not work in the installer! I thought it wouldn’t be an issue as I can enter the BIOS and change settings there without using a keyboard. So I needed to connect somehow a keyboard to the tablet while I have the installer running from an external disk. Of course, the easiest solution would have been to attach the flash drive and the keyboard to a USB hub, then plug it into the OTG adapter. As I did not have a hub at home, I’ve tried to find a different solution.
Luckily, the tablet also has a micro SD card reader, so theoretically a card could be made into a bootable disk, and a keyboard could be connected to the micro USB port with an adapter. Rufus created an installer media at first try from an ISO downloaded by the MediaCreationTool, but it turned out that the BIOS cannot detect the card reader, so it wouldn’t boot from there. Okay, one way to circumvent this is loading a smart bootloader from a flash drive, then replacing the drive with a keyboard and selecting the micro SD card as a boot device with it. I’ve tried several versions of Ubuntu first, both 32-bit and 64-bit, but the UEFI BIOS just did not want to start the bootloader from those disks. Then I’ve tried Hiren’s boot CD without any luck. Then I’ve downloaded rEFInd Boot Manager, but neither did this work.
At this point, I still had faith in rEFInd, as I’ve read about its configuration file. Unfortunately, it was on the EFI partition on the flash drive. To modify the file, first I needed to mount the filesystem as something Windows supports.
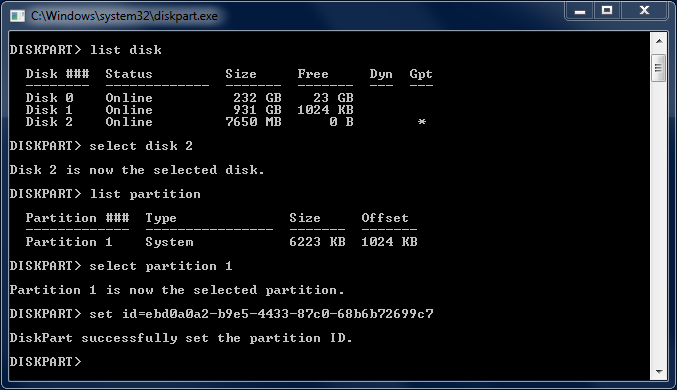
list disk
select disk 2
list partition
select partition 1
set id=ebd0a0a2-b9e5-4433-87c0-68b6b72699c7
With these commands in diskpart.exe, I set the partition type from EFI to a regular data partition, and as EFI partitions happen to have plain old FAT16 (or FAT12?) file system, now I could assign a drive letter to it. (See the docs for DiskPart for the origin of this magic value.)
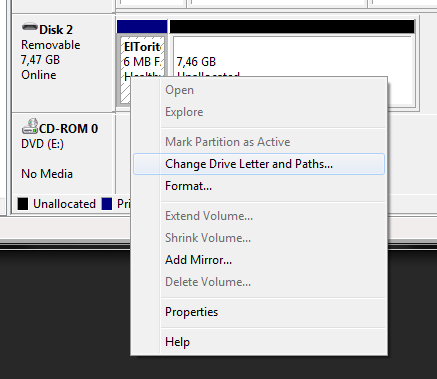
After editing the config file to add every possible device type to the list that the bootloader needs to scan for, I removed the drive letter from the partition and changed back the partition type to EFI:
set id=c12a7328-f81f-11d2-ba4b-00a0c93ec93b
… And it did not detect the card.
It was high time to abandon this path, and just order a USB hub from Amazon. I chose a powered one, as there’s less chance with them for errors caused by insufficient power supplied to the connected devices. It arrived the next day, so I did not have to wait too much to see my plan fail yet again. The tablet did not detect anything connected to it through the hub!
I’ve read article after article trying to figure out what to do next when I stumbled upon a row on the Create installation media for Windows: ‘things you’ll need: […] a product key.’ Oh, my… I do not know the product key for the tablet. I guessed that Windows 10 would sort it out itself, but just in case, I should save the key. It was time to copy NirSoft ProduKey to a flash drive, boot the tablet into the Windows Recovery Console, and use a handy trick: start notepad.exe from the console, and then browse the filesystem for the executable in its Open dialog. When I found it, I launched it by selecting Run as administrator from the right-click contextual menu. It worked! I quickly saved the key to the flash drive, then…
… Then I remembered that the Windows installer could be started with a double click from the disk inside a running Windows! Okay, nothing to lose, I’ve tried to start setup.exe with the same trick. And to my relief, it did start!
And when it completed the installation, it asked for the Wi-Fi name and password, so I had the network card working! Great, let me select my network by tapping on it. Erm… The touch driver is still missing… A task for another day…